A high-quality frameless shower door installation is about much more than just hanging a piece of glass. It’s a meticulous process that can completely transform your bathroom, turning it into a modern, spa-like retreat. For homeowners in Salinas and Monterey County, a professional installation is the key to getting that sleek, watertight seal that adds serious beauty and value to your home.
Why a Frameless Shower Door Is the Ultimate Bathroom Upgrade
A frameless shower door doesn't just keep water in—it elevates your bathroom's entire design. By ditching the bulky metal frames of traditional doors, you create an open, airy feeling that makes the whole room seem larger and more luxurious. This clean, minimalist look is exactly why they've become so popular with homeowners across California.
This isn't just a local trend in Monterey. The frameless shower door market is booming, expected to jump from US$ 5.12 billion in 2024 to almost US$ 9.80 billion by 2033. This massive growth, detailed in an analysis by IMARC Group, is fueled by homeowners wanting that clean, modern bathroom style.
Maximizing Aesthetics and Home Value
For anyone living in Monterey and Carmel, where home presentation is everything, a frameless shower door is a no-brainer. It puts your beautiful tile and stonework on full display, instead of hiding it behind a clunky frame. This seamless look not only makes your daily routine feel more upscale but can genuinely boost your property's resale value.
Here’s what you get with a professional installation:
- More Space and Light: The clear glass lets natural and artificial light flow freely, instantly brightening up your bathroom.
- Easier Cleaning: Forget scrubbing metal tracks full of soap scum. A quick wipe of the glass is all it takes to keep it sparkling.
- Tough and Safe: These doors are made from thick, tempered glass—usually 3/8-inch or 1/2-inch—so they're incredibly sturdy and built to last.
A well-installed frameless door is more than just an upgrade; it’s a smart, long-term investment in your home's style and function. It tells potential buyers that you value quality and attention to detail, a key factor for homes in our local market.
While tackling a project yourself can be satisfying, the sheer weight of the glass and the precision needed for a perfect, leak-free fit make this a job best left to the experts. To see the different styles available, check out our guide to glass shower doors in Monterey, CA. As a locally owned, family-operated business serving Salinas and beyond, we make sure every installation is done right.
Preparing Your Shower for a Flawless Installation
A stunning frameless shower door doesn't just happen. Its success truly hinges on what you do before the glass even arrives. For homeowners in Carmel and Monterey, we can't stress this enough: proper prep work is the single most important factor in getting that professional, watertight finish you’re dreaming of.
This prep phase is all about precision and a good, honest assessment of your space. Before you even think about hardware or glass styles, you have to ensure the foundation—your shower enclosure itself—is rock-solid and ready to support those heavy panels. Rushing this stage is a common mistake that almost always leads to major headaches.
Taking Accurate Measurements
You've heard "measure twice, cut once," but for frameless glass, it’s more like "measure three times, and then have a professional check again." This glass is custom-cut with incredibly tight tolerances, which means there is virtually no room for error. A small mistake here can turn an expensive panel of glass into a very large, very clear paperweight.
You'll need to measure the width of your shower opening at the very top, in the middle, and along the bottom curb. It's common for walls in Monterey County homes to have a slight bow, and these three measurements will expose any inconsistencies. You'll also need to measure the height on both sides where the glass will be installed.
Assessing Your Shower Structure
Beyond just the numbers, the structural integrity of your shower walls and curb is absolutely critical. Since frameless doors depend entirely on hardware mounted directly to the walls, those anchor points have to be exceptionally secure.
- Check for Plumb: Use a long level to see if your walls are perfectly vertical (plumb). A wall that's out of plumb by more than 1/4 inch will require special adjustments during installation.
- Verify a Level Curb: The curb where the door will sit must be perfectly level and slightly sloped into the shower. If it slopes outward, even a tiny bit, water will find its way onto your bathroom floor.
- Inspect Your Tile and Grout: Make sure the area is completely free of mildew and mold. Addressing any existing grout issues is vital; you can find great grout cleaning strategies to halt mold growth to prepare a clean foundation.
Finally, a stud finder is an absolute must-have. You need to know exactly where the wall studs are to anchor your hinges. Mounting heavy glass panels directly to tile without hitting a stud is a recipe for disaster.
The Professional Installation Process
With all the prep work done, it's time for the most satisfying part of the job: getting the glass in place. This is where you finally see your bathroom's transformation take shape. For our professional team at Signature Glass and Windows, this is a methodical process focused on safety and precision.
First things first: this is absolutely a two-person job. Tempered glass panels are heavy and awkward to handle, especially in the tight quarters of a bathroom. Having an experienced partner is non-negotiable for safety and preventing a costly mistake.
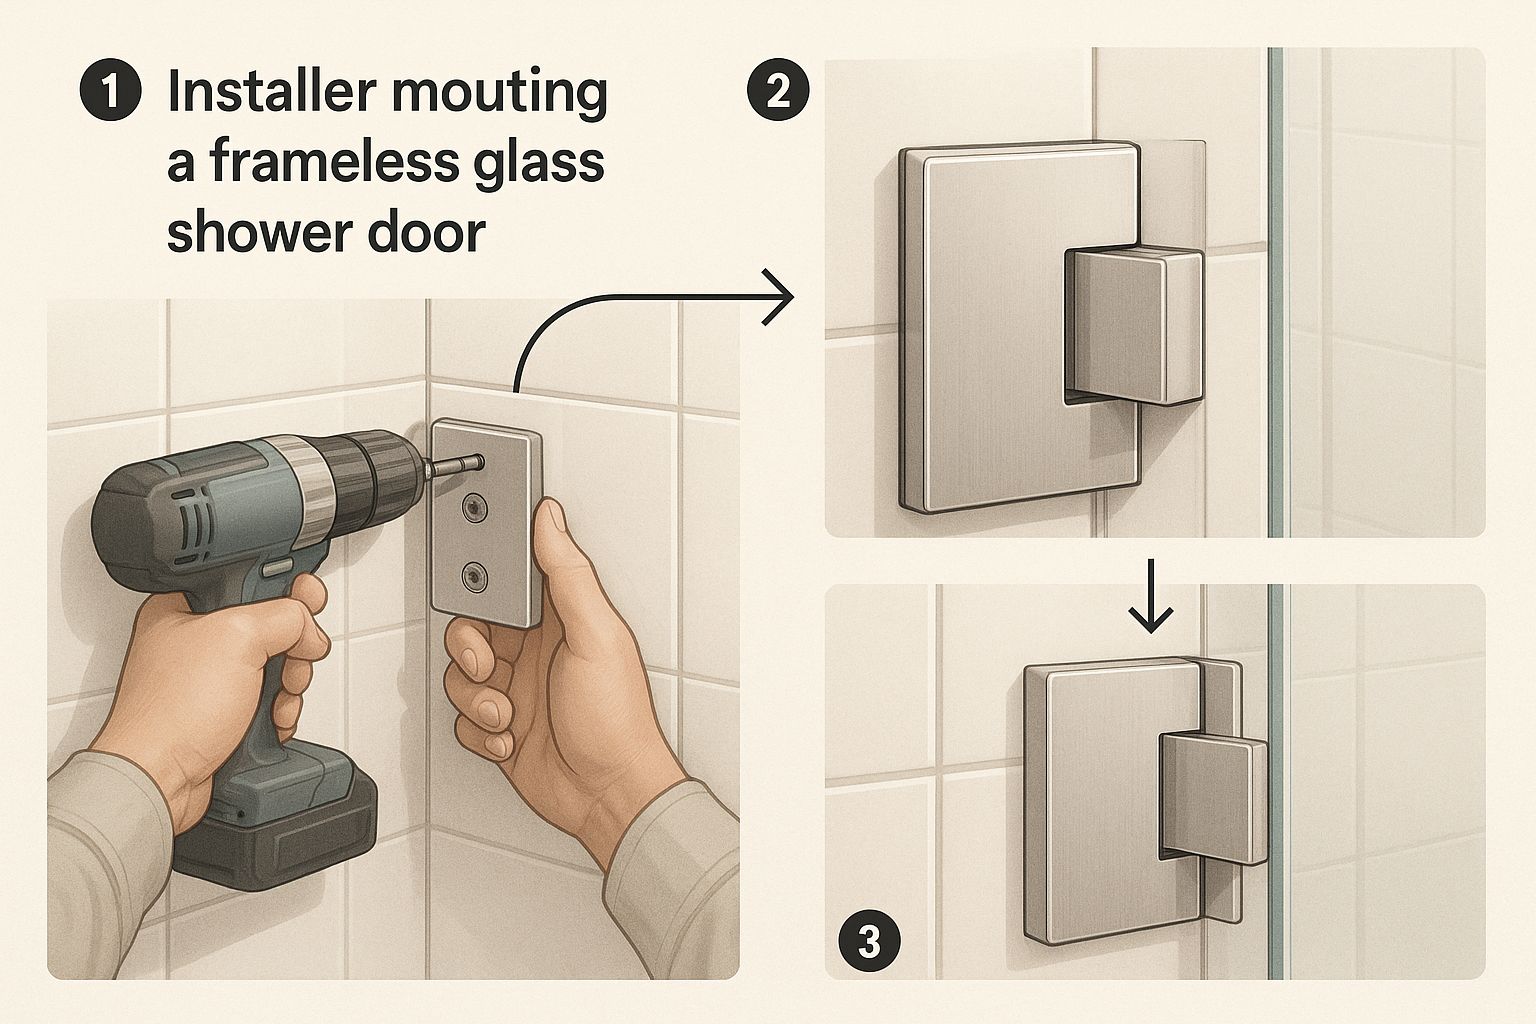
Marking And Drilling With Precision
Those careful measurements become our roadmap for drilling. We use a level and a pencil to transfer marks onto your tile, showing exactly where the hinges or U-channel will be mounted. For the beautiful but tough porcelain tile common in Salinas and Carmel homes, we must use a diamond-tipped drill bit to prevent cracking.
We drill pilot holes slowly, with steady pressure. A pro tip we use is to place masking tape over the marks before drilling. This gives the drill bit something to bite into and stops it from "walking" across a slippery tile surface.
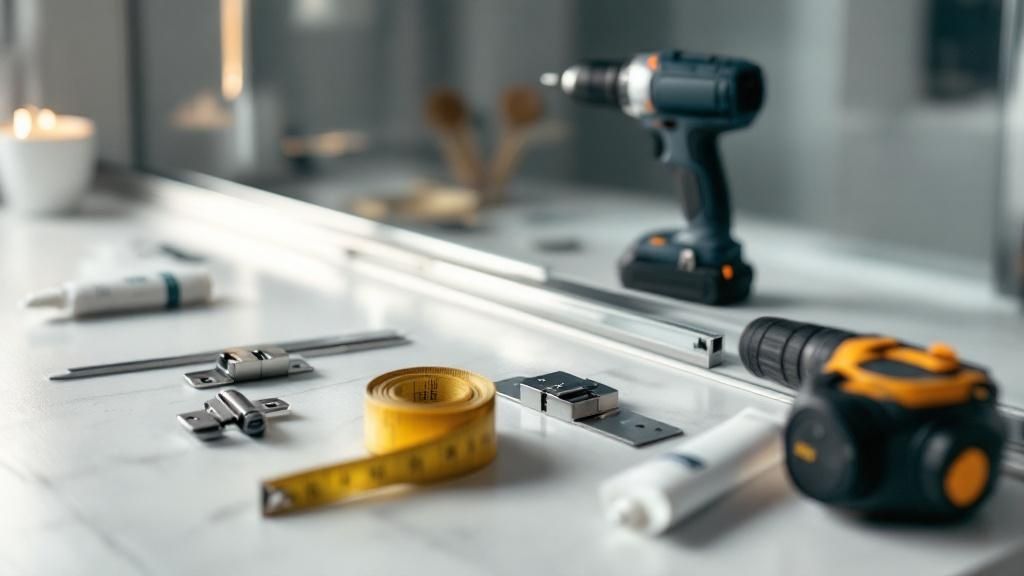
Essential Tools for a Professional Installation
| Tool/Material | Purpose | Pro Tip for Homeowners |
|---|---|---|
| Tape Measure | For all measurements and confirming dimensions. | Double-check every measurement. "Measure twice, drill once" is the mantra here. |
| Level (4-foot) | Ensures panels and hardware are perfectly plumb and level. | A longer level gives you a more accurate reading across the full height of the glass. |
| Pencil & Masking Tape | To mark drilling locations on tile. | The tape prevents the drill bit from slipping and reduces the risk of chipping the tile. |
| Drill with Diamond-Tipped Bit | To drill into hard materials like porcelain or ceramic tile. | Use a slow, steady speed and apply light, even pressure. Let the bit do the work. |
| Silicone Sealant | Creates a waterproof seal along edges and in channels. | Choose a 100% silicone sealant rated for kitchen and bath use to prevent mold. |
| Caulking Gun | To apply silicone sealant evenly. | Cut the nozzle at a 45-degree angle for a cleaner bead. |
| Setting Blocks | Small plastic shims to support the glass and create spacing. | These are non-negotiable for protecting the glass edge and achieving perfect alignment. |
| An Experienced Helper | For safety when lifting and positioning heavy glass panels. | Brief your helper on the plan before you lift the glass. Communication is key. |
| Safety Glasses | Protects your eyes from tile chips and dust. | Wear them from the moment you start drilling until the final cleanup is done. |
Securing The Panels And Door
Typically, we install any stationary panels first. If the design uses U-channels, we secure those to the wall and curb, apply a bead of silicone inside, and then carefully set the fixed panel. For a true frameless look with wall-mount hinges, we attach the hinges directly to the wall first.
We always use setting blocks under the glass panels during installation. These little plastic shims are invaluable. They protect the bottom edge of the glass from chipping and allow us to make tiny adjustments for perfect alignment before tightening everything down.
With the stationary panel secure, it’s time to hang the door. Working together, we carefully lift the door and align its pre-cut notches with the hinges. We secure the hinge plates, but don’t crank them down completely until we've checked its alignment against the fixed panel and the wall, ensuring a flawless fit. While the core concepts are similar for different glass doors, you can find more general glass door installation tips for a broader overview.
Applying Finishing Touches for a Watertight Seal
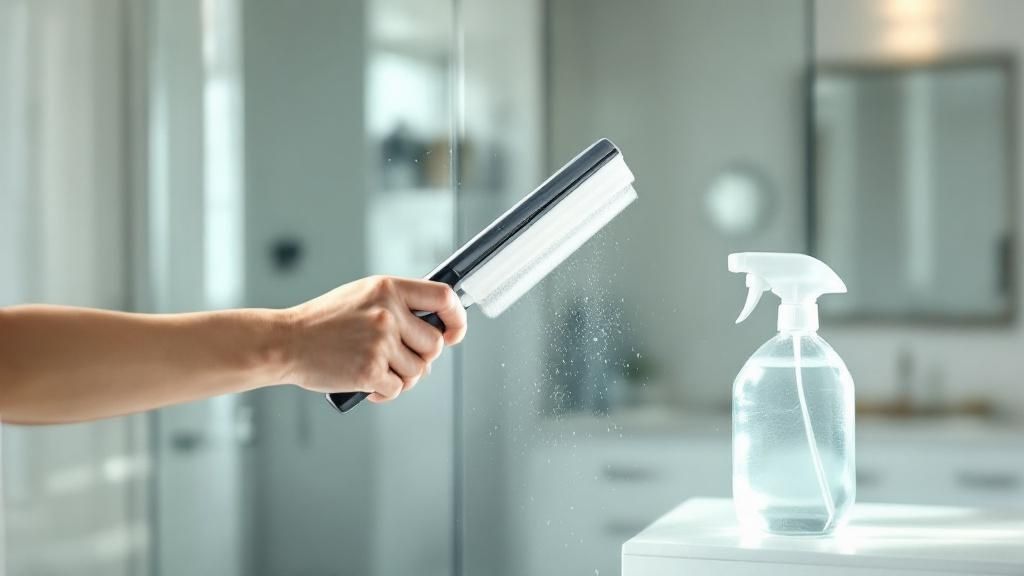
With the heavy glass panels securely in place, the job isn't quite done. This final stage is all about the details. These small but critical steps ensure your beautiful new shower is completely watertight and functions perfectly for years. For homeowners in Salinas, a messy or incomplete finish can undermine all the hard work that came before it.
A frameless shower door installation is only as good as its seal. This is where we prevent leaks and give the entire setup that clean, professional look. Rushing these finishing touches is a common DIY mistake that leads to water damage and frustration.
Achieving a Perfect Silicone Seal
The most important step for a leak-proof shower is applying a high-quality silicone sealant. We run a thin, consistent bead of 100% mold-resistant silicone along every seam where the glass meets the tile walls or the shower curb. This is your primary barrier against water.
To get that clean, smooth line, we cut the tip of the caulking tube at a 45-degree angle, keeping the opening small. We apply steady pressure as we pull the caulking gun along the seam in one continuous motion for a flawless finish.
Installing Final Hardware and Seals
Once the silicone is applied, we move on to the final hardware components that complete the frameless look. This typically includes:
- The Door Handle: Most handles are simple to install, passing through pre-drilled holes in the glass and tightening securely.
- Vinyl Seals: These clear polycarbonate or vinyl strips press-fit right onto the edges of the glass panels. You'll have a "strike" seal for the side of the door and a bottom "sweep" that creates a barrier at the curb.
It’s no surprise these installations are getting more popular. The frameless shower door market, valued at around US$ 1.25 billion in 2024, is projected to hit US$ 2.15 billion by 2033. This growth is fueled by innovations in glass technology and a bigger push for water-efficient homes—something a well-sealed frameless door supports. These improvements mirror advancements in other areas, like how learning about energy-efficient windows in Salinas, CA can help you save on utility bills.
Finally, and this is crucial, let the silicone cure for at least 24-48 hours before using the shower. We know it’s tempting to test your handiwork, but using the shower too soon will wash away the uncured sealant and undo the watertight seal you just worked so hard to create.
Troubleshooting Common Installation Challenges
Even the most carefully planned frameless shower door installation can hit a snag. It's a classic DIY moment: you’ve measured twice, but you still discover the wall isn't perfectly plumb. Many Salinas homeowners run into these exact issues, which is why professional experience is so valuable.
While they might seem small, these imperfections can cause big headaches, from sagging doors to persistent leaks, if not tackled correctly. The real trick is knowing how to make small, on-the-fly adjustments—and knowing when a problem requires a professional solution.
Correcting Minor Misalignments
So, you’ve hung the door and it's sagging a little. Don't panic. This is often fixable. Most quality frameless hinges come with built-in adjustment screws that allow for tiny corrections—up, down, or side-to-side.
Sometimes the fix is even simpler: shims. If you're dealing with a small, uneven gap, you can slide tapered vinyl shims between the glass and the hinge. This subtly changes the angle of the door without causing any damage to the glass.
When to Call a Professional
While some issues are manageable, others are clear signals that it’s time to call an expert. If you discover your shower curb actually slopes outward instead of back into the shower, no amount of silicone will stop it from leaking. That’s a fundamental structural problem.
Likewise, if a wall is out of plumb by more than a quarter-inch, you’re past the point of simple adjustments. This situation might require specialized hardware or having glass custom-cut to compensate for the angle. For these complex issues, calling a trusted local installer in Monterey County is the smartest move. Our guide on how to choose a window installer has great tips that apply here, too.
Frequently Asked Questions (FAQs)
As a family-operated business in Salinas, we’ve heard just about every question you can imagine from homeowners across Monterey County. Here are some of the most common ones we get about frameless shower door installation.
How thick should the glass be for my frameless shower door?
For most bathrooms in our area, the sweet spot is either 3/8-inch or 1/2-inch thick tempered glass. The industry standard, 3/8-inch glass, provides excellent stability and that high-end, heavy feel. If you have a very large enclosure or want an ultra-luxurious look, 1/2-inch glass is the way to go.
Can a frameless door be installed on any shower wall?
Not quite. The weight of a frameless door is substantial, so the hinges must anchor into solid backing. This means drilling through tile and directly into wall studs. You cannot safely mount heavy glass hinges into drywall or a standard fiberglass insert alone, as they lack the strength to hold the door.
How do you prevent a frameless shower door from leaking?
A truly leak-proof shower is the result of three things: a correctly sloped shower curb, precise measurements to minimize gaps, and a professional application of high-quality, mold-resistant silicone and vinyl seals. When an experienced pro from a company like ours does the job, leaks aren't a concern.
Is a DIY frameless installation a good idea for most homeowners?
Honestly, for most people, it's a very tough project. Tempered glass is incredibly heavy, and a tiny mistake in your measurements can make a whole custom panel useless. For homeowners in Monterey County who want a perfect fit and peace of mind, we always recommend calling a professional.
How long does a professional installation take?
Our team can typically install a standard frameless shower door in 3 to 5 hours. The most important part is letting the silicone sealant cure for a full 24 to 48 hours before using the shower. Rushing this critical step is a common mistake that can ruin the watertight seal.
Ready to transform your bathroom with a beautiful, professionally installed frameless shower door? The experts at Signature Glass and Windows, Inc. are here to help. As a locally owned, family-operated business, we bring decades of experience and quality craftsmanship to every home in Salinas, Monterey, and the surrounding communities.
Contact Signature Glass and Windows today for a free in-home consultation.
Call: 831-754-8855
Visit: https://signatureglassandwindows.com