For homeowners in Salinas, Monterey, and the surrounding communities, new windows are a significant investment in your home's comfort, value, and energy efficiency. The success of your project, however, hinges entirely on the quality of the installation. Even the highest-rated Energy Star windows can underperform if not installed with precision, leading to drafts, leaks, and lost energy savings.
This guide provides essential window installation tips straight from the pros at Signature Glass and Windows, Inc. We'll give you the actionable insights needed to understand what a high-quality installation entails for your home in Monterey County. Whether it’s windows or another project, like this complete solar panel installation guide, tackling home upgrades requires careful planning.
Whether you're a hands-on DIYer or simply want to be an informed consumer when hiring a professional, these tips will help ensure your new windows deliver lasting performance. Following these best practices is key to protecting your investment.
1. Precise Measurement and Planning – The Foundation of Success
Of all the window installation tips, none is more foundational than achieving precise measurements. This critical step happens before the first tool is ever picked up and prevents costly errors that compromise fit and energy efficiency. A window that is even a fraction of an inch off can lead to drafts, water leaks, and operational issues.
For homeowners in Salinas and across Monterey County, where coastal climate shifts cause building materials to expand and contract, this precision is non-negotiable. An ill-fitting frame creates gaps that undermine the insulating properties of high-performance glass, making your investment less effective.
The Professional Measurement Process
Professional measurement involves more than just a single width and height check. Installers must account for the reality that no opening is perfectly square, especially in older homes that have settled over time.
A meticulous approach includes:
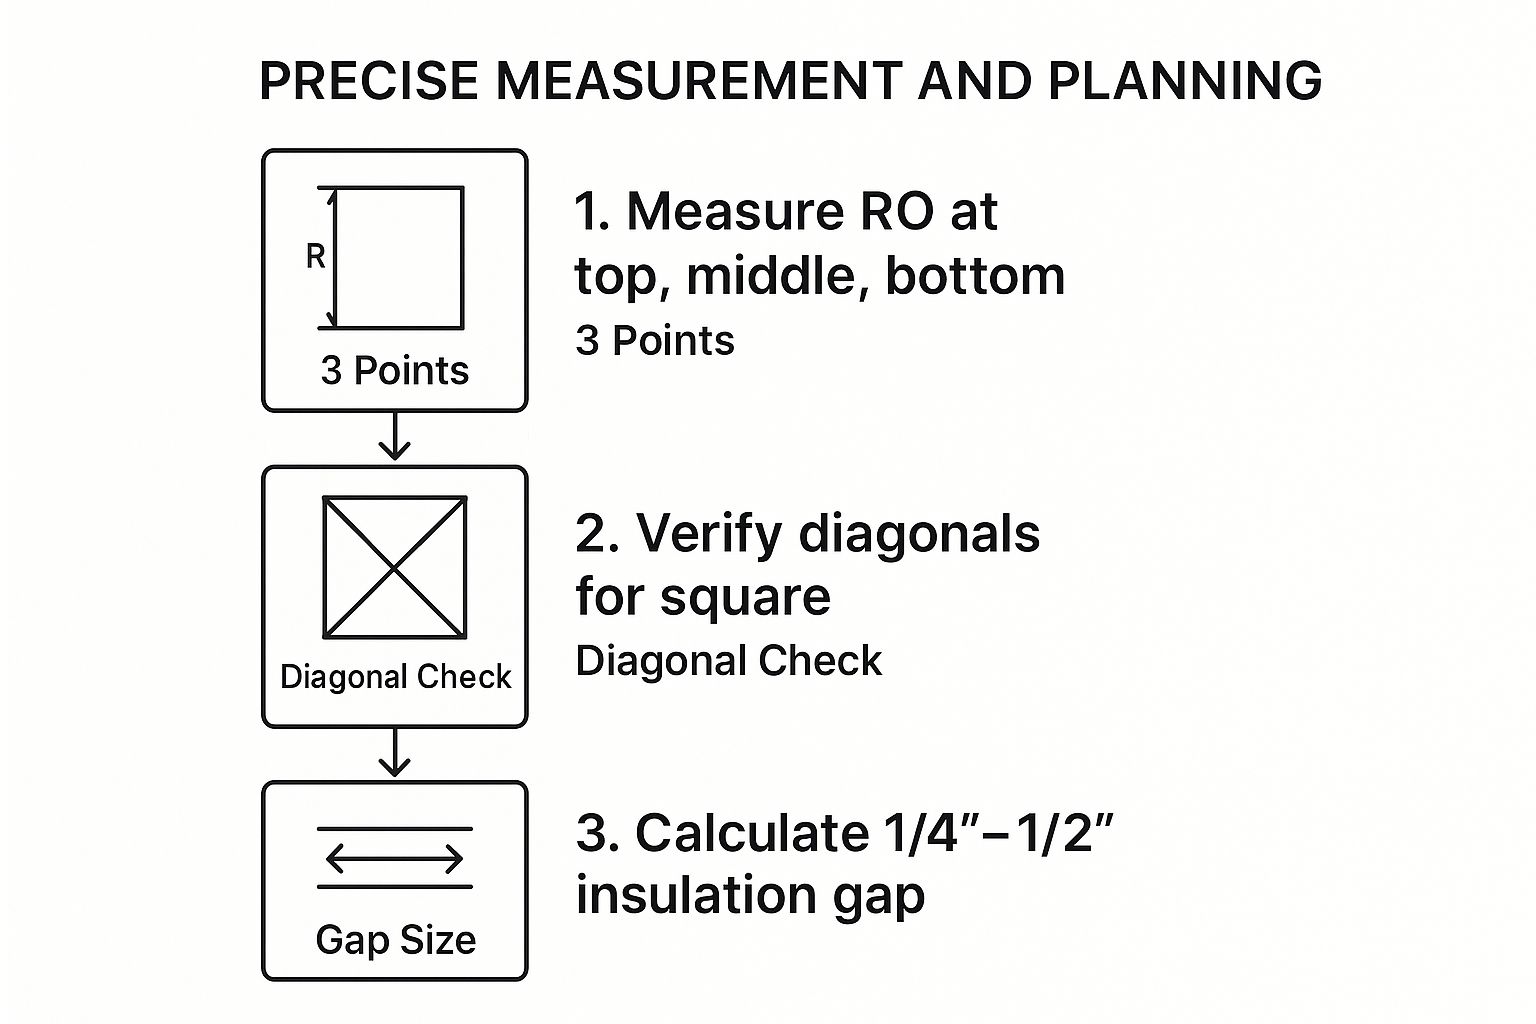
- Multiple Measurement Points: Checking the width of the rough opening at the top, middle, and bottom.
- Diagonal Verification: Measuring diagonally from corner to corner to ensure the opening is square. A significant difference indicates an out-of-square frame that needs addressing.
- Calculating for Shims and Insulation: Leaving a calculated gap, typically between 1/4 and 1/2 inch, around the new frame for shimming and insulation.
This infographic breaks down the core steps of the professional measurement workflow.
This systematic process guarantees that custom windows fit flawlessly. While DIY is tempting, the nuances of this step are why many Salinas homeowners trust our seasoned experts. To dive deeper, you can learn more about the correct way to measure for replacement windows.
2. Proper Flashing and Weather Barrier Installation
A window's long-term defense against moisture relies entirely on proper flashing and weather barrier integration. This is one of the most crucial window installation tips because it creates a sophisticated drainage plane that protects your home’s structure. Flashing directs water away from the vulnerable seams around the window, preventing rot, mold, and costly damage.
For homeowners in coastal areas like Monterey and Carmel, where wind-driven rain is constant, a robust weatherproofing system is essential. An improperly flashed window is one of the most common points of failure in a home's building envelope. This step ensures that your investment is protected from the elements for years to come.
The Art of a Weathertight Seal
Achieving a durable, weathertight seal involves more than just applying caulk. Professionals follow a layered, systematic approach to integrate the window into the home's existing weather-resistive barrier (WRB), like Tyvek house wrap. The sequence is critical to ensure water always flows down and out.
A professional flashing process includes:
- Layered Installation: Flashing is always installed from the bottom up—sill first, then side (jamb) flashing, and finally the top (head) flashing. This shingle-style layering ensures water drains properly.
- Seamless Integration: The jamb and head flashing must be carefully integrated with the house wrap, often involving specific cuts and taping all seams with high-quality tape.
- High-Performance Materials: Using self-adhering butyl or acrylic flashing tapes creates a permanent, waterproof bond. For optimal protection, products like Siga Fentrim tapes are highly recommended.
This methodical approach, guided by industry standards, is a technical skill that separates a standard job from a high-performance, long-lasting installation.
3. Checking and Ensuring Square and Level
Ensuring a window is perfectly square, level, and plumb during installation is critical for long-term performance. A window that is not set correctly will not function as designed. This attention to detail directly impacts ease of operation, weather sealing, and the structural integrity of the unit.
For homeowners in Salinas and Monterey County, a square and level installation is non-negotiable. An improperly set window can bind, refuse to lock correctly, or create uneven gaps in the weatherstripping. These gaps compromise the airtight seal, leading to drafts and reduced energy efficiency.
The Professional Alignment Process
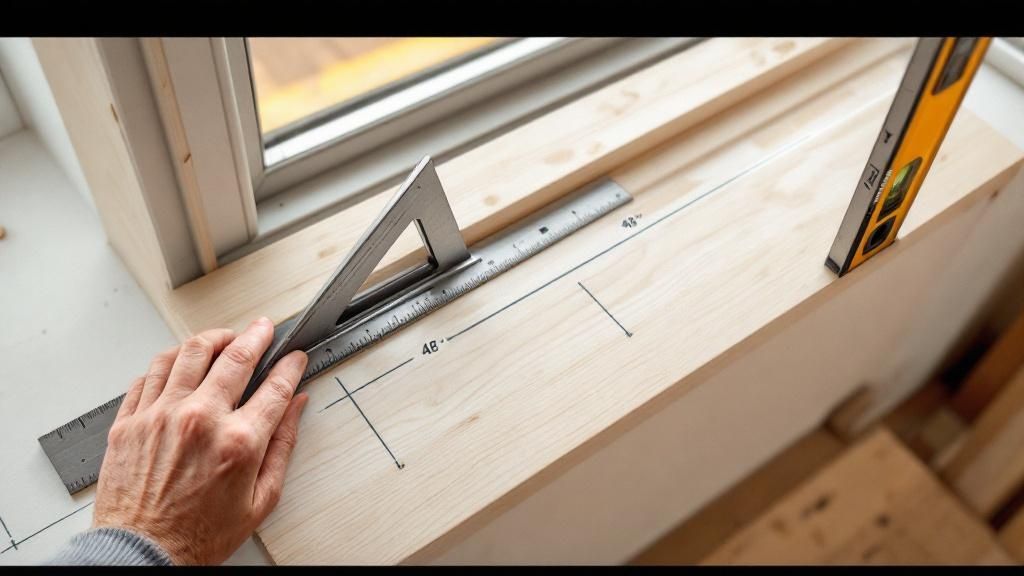
Achieving a perfect fit involves a meticulous process of adjustment and verification. Installers use precision tools like a 4-foot level, constantly checking the window as it's secured. Micro-adjustments are made with shims to get everything just right.
A professional alignment process includes:
- Leveling the Sill: The first step is to ensure the bottom of the window is perfectly level, providing a stable base for the entire unit.
- Plumb and Square Verification: Once placed, installers check that side jambs are perfectly vertical (plumb) and all corners are at a 90-degree angle (square).
- Strategic Shimming: Using high-quality composite shims, installers add support around the frame, especially at lock points and hinges, to prevent bowing.
This systematic approach guarantees that every window operates effortlessly. To see the consequences of improper alignment, you can learn more about common window installation problems.
4. Proper Shimming and Support Techniques
The physical support and alignment of the window frame guarantee its long-term stability and function. This is where proper shimming techniques become an essential window installation tip. Shims are small wedges used to level, plumb, and square the window within its rough opening, preventing frame distortion.
For homes in the Salinas area, where even minor ground settling can affect a structure, correct shimming is crucial. A poorly supported window frame can sag or twist, compromising seals and causing sticking sashes. This meticulous work ensures your energy-efficient windows maintain their airtight seal.
The Professional Shimming Process
Professional installers understand that shimming is both an art and a science. The goal is to create a perfectly aligned, stress-free installation that will stand the test of time.
A professional approach to shimming includes:
- Targeted Placement: Placing shims at key load-bearing locations, like under vertical mullions and at hinge and lock points.
- Using Shim Pairs: Installing shims in opposing pairs (one from the interior, one from the exterior) to create a flat, stable surface for fastening.
- Sill and Frame Support: Ensuring the sill is fully supported to prevent sagging, especially under the weight of large picture windows.
- Checking for Squareness: Continuously checking that the window remains plumb, level, and square as shims are adjusted.
Proper shimming prevents the frame from bowing or warping. To see how these techniques fit into the bigger picture, you can explore this detailed window installation guide.
5. Insulation and Air Sealing Best Practices
A perfectly installed window can still underperform if the gap between the frame and the rough opening isn't properly sealed. Effective insulation and air sealing are crucial window installation tips that prevent heat from bypassing the window's insulated glass. This step is key to maximizing the energy efficiency you paid for.
For homeowners in coastal climates like Salinas and Monterey, proper sealing is especially critical. A comprehensive air sealing strategy protects your home's structural integrity from humid, salty air. It also improves indoor air quality and ensures your energy bills reflect the performance of your new windows.
The Professional Sealing Process
Creating an airtight seal requires more than a quick bead of caulk. The goal is to fill the entire cavity around the frame with appropriate insulation without distorting it, a common DIY mistake.
A meticulous approach to insulation and air sealing includes:
- Using Low-Expansion Foam: Applying a minimal expanding foam designed for windows and doors that fills gaps without exerting excessive pressure.
- Applying Backer Rod First: For gaps wider than 1/4 inch, a flexible foam backer rod is inserted first to provide a solid surface for the sealant.
- Sealing from the Inside and Out: Creating a continuous air barrier involves careful sealing on both the interior and exterior perimeters.
- Testing Before Trimming: After the foam has cured, installers test every window to ensure smooth operation before the final interior trim is installed.
This methodical process guarantees no air or water can infiltrate. To see how this contributes to overall energy savings, you can learn more about saving energy at home.
6. Fastener Selection and Placement Strategy
Securing a window properly is about ensuring long-term structural integrity. A vital window installation tip is having a deliberate strategy for fastener selection and placement. The right fasteners prevent frame distortion, maintain weather-tight seals, and allow for natural expansion and contraction.
For homeowners in coastal areas like Monterey and Carmel, this detail is especially critical. The salt-laden air aggressively corrodes improper metals, leading to premature failure. Using corrosion-resistant fasteners is a fundamental requirement for a durable installation in our local climate.
The Professional Fastening Approach
A professional approach to fastening goes beyond simply driving screws into the frame. It involves a calculated method that considers material compatibility, load requirements, and precise placement.
A strategic fastening process includes these key considerations:
- Material Compatibility: Choosing fasteners designed for the window frame and home's structure. For coastal installations, stainless steel or specialized coated fasteners are non-negotiable.
- Correct Placement and Spacing: Following the manufacturer’s specifications for fastener spacing to distribute the window's weight evenly.
- Proper Driving Technique: Pre-drilling holes where needed and avoiding over-tightening fasteners, which can distort the window frame and break the airtight seal.
This methodical technique ensures the window is securely anchored to the home’s structure, guaranteeing its stability and functionality.
7. Exterior Caulking and Sealant Application
Proper exterior sealing is one of the most critical final window installation tips. This last line of defense creates a durable, weatherproof barrier against water intrusion, air leaks, and pests. Applying a professional-grade sealant is essential for long-term performance and structural integrity.
For homeowners in Monterey County, where coastal fog and rain are common, a flawless seal is paramount. Even a tiny gap can allow moisture to penetrate the wall cavity, leading to rot and mold. This step ensures your new energy-efficient windows maintain their performance.
The Professional Sealing Process
Applying sealant correctly requires more than just a caulk gun. Professionals follow a systematic process to ensure the seal is durable, effective, and clean-looking.
A meticulous approach includes:
- Surface Preparation: Ensuring all surfaces are completely clean, dry, and free of dust or old caulk for proper adhesion.
- Backer Rod for Large Gaps: For gaps wider than 1/4 inch, a foam backer rod is inserted into the joint before caulking to create the ideal sealant depth.
- Proper Application and Tooling: Applying a consistent bead of high-quality sealant and then "tooling" it to smooth the bead and create a strong, clean seal.
- Avoiding Critical Areas: Never applying caulk over weep holes or other built-in drainage paths designed to let water escape.
This final touch separates a standard job from a professional, long-lasting installation, ensuring the seal will withstand Salinas’s weather for years.
Frequently Asked Questions (FAQs)
How long does a typical window installation take for a home in Salinas?
For a standard project in Salinas or Monterey, most window installations can be completed in 1-2 days. The exact timeline depends on the number of windows, their size, and the condition of the existing window frames. Our team at Signature Glass and Windows always works efficiently while prioritizing quality craftsmanship.
Do I need a permit to replace my windows in Monterey County?
In most cases, yes. Monterey County and cities like Salinas often require a permit for window replacement, especially if you are changing the size of the window opening. As your local expert, we handle the entire permitting process for you, ensuring your project is fully compliant with local building codes.
What is the best type of window for the coastal climate in Carmel and Monterey?
Vinyl and fiberglass windows are excellent choices for coastal homes in Carmel and Monterey. They are highly resistant to moisture, salt air, and corrosion. According to the U.S. Department of Energy, these materials offer great energy efficiency and require minimal maintenance, making them a durable, long-term investment.
How can I tell if my old windows need to be replaced?
Common signs include difficulty opening or closing them, drafts or noticeable air leaks, condensation between the glass panes, and peeling paint or rot on the frame. If you notice any of these issues in your Monterey County home, it's a good time to schedule a free consultation with a professional.
Is professional window installation worth the cost?
Absolutely. While DIY can seem tempting, professional installation ensures your windows are measured, sealed, and secured correctly. This prevents costly problems like water damage and air leaks, maximizes energy savings, and upholds the manufacturer’s warranty—protecting your investment for decades.
Your Trusted Local Partner for Expert Window Installation
Navigating a window replacement project can feel overwhelming, but you are now better equipped to recognize what separates an average job from superior craftsmanship. These aren't just minor details; they are the essential elements that define a high-performance window installation.
The most critical takeaway is that a premium window only performs as well as its installation. A flawless installation protects your investment by preventing common issues like water intrusion and air leaks. As a homeowner in Monterey County, this knowledge empowers you to ask the right questions and hold your chosen installation team to the highest standards.
For residents from Salinas to Carmel, a professional installation is the final, most important step in realizing the full benefits of your new, energy-efficient windows.
Ready to partner with a team that lives and breathes these principles of quality? Trust the local, family-operated experts at Signature Glass and Windows Inc. to bring decades of factory-certified expertise to your home. Contact Signature Glass and Windows today for a free in-home consultation at 831-754-8855 or visit us online at Signature Glass and Windows Inc. to schedule your appointment.