Casement windows add classic charm to homes across Monterey County, from Salinas to Carmel. But when they stick, refuse to crank, or let in drafts, they can be a frustrating problem. As a local, family-owned business with decades of experience, Signature Glass and Windows understands the common issues that affect windows in our unique coastal climate, especially in older homes. This guide shares our top fixes for repairing a casement window like a pro, helping you tackle everything from a broken crank to a faulty seal.
We'll share practical tips to restore your window's function, improve your home's energy efficiency, and save you money. Our goal is to help homeowners in Salinas decide when a simple DIY fix is the right approach and when it's time to call our experts. To keep your windows in top shape, consider these 5 essential maintenance tips for aluminum windows.
This guide covers everything you need to know, from hardware adjustments to replacing weatherstripping. Let's dive into the solutions that will get your casement windows working perfectly again.
1. Weatherstrip Replacement and Sealing
One of the easiest fixes for a drafty casement window is replacing old weatherstripping. Over time, the seal can crack, flatten, or peel away, creating gaps that let in cold air, moisture, and noise. A simple repair can restore the airtight seal, making your home more comfortable and energy-efficient.
This fix is perfect for windows that are in good shape but feel drafty. If you feel a breeze near your closed window or notice your energy bills going up, bad weatherstripping is a likely cause. For homeowners in coastal towns like Monterey, a tight seal is also key to keeping damp, salty air out.
The Repair Process: A Step-by-Step Guide
The process involves removing the old, brittle material and cleaning the window frame for a new seal. The goal is to create a clean surface so the new weatherstrip sticks properly. A good installation can make an old window perform like new again.
The infographic below shows the basic steps for replacing weatherstripping, from removal to the final application.
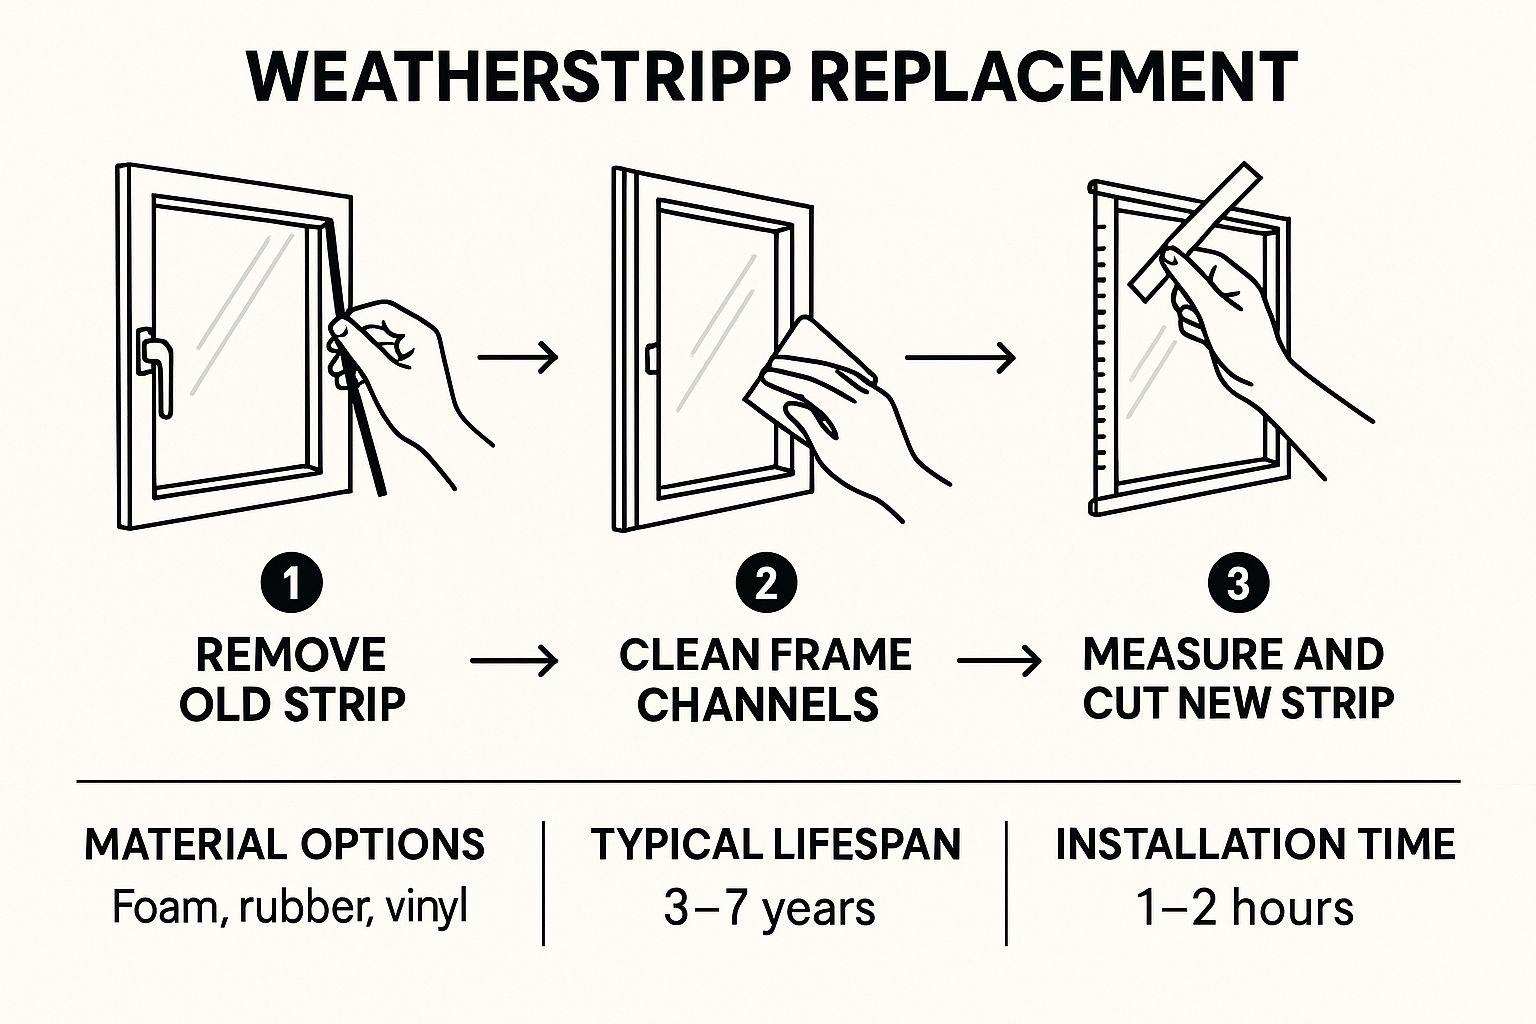
As the guide shows, the process is simple but requires attention to detail. Cleaning and measuring carefully are important for a perfect, airtight fit.
Actionable Tips for a Professional Finish
To make sure your repair lasts, follow these tips from our decades of experience:
- Clean the Channels Thoroughly: Use a strong cleaner to remove all old glue and dirt from the window frame channels. A clean surface is needed for the new seal to stick.
- Pick the Right Material: Choose a weatherstrip material like foam, rubber, or vinyl that works for your window and local climate. EPDM rubber is a great choice for the changing weather in Monterey County.
- Measure for a Snug Fit: The new weatherstrip should be thick enough to squish down about 25-50% when the window is closed. This creates a firm seal without straining the crank.
- Install in Mild Weather: Apply new adhesive weatherstripping when it's warmer than 50°F. This helps the adhesive stick correctly for a strong bond.
While replacing weatherstripping is a good DIY project, getting a perfect seal can be tricky. For more help, you can learn about professional window weather stripping for casement windows. If the frame itself is damaged, it's best to call a pro.
2. Casement Window Hardware Adjustment and Replacement
When a casement window is hard to open, close, or lock, the problem is often its hardware. Fixing the crank, hinges, and locks is a key part of repairing a casement window like a pro. These parts wear out over time, leading to stripped gears or bent arms that affect how the window works and how secure it is.
This repair is needed for windows that are stiff, make a grinding noise, or won't close all the way. For homeowners in Salinas with older properties, replacing a worn-out crank operator can make the window work smoothly again. In coastal areas, upgrading to rust-resistant hardware is a smart choice to fight the damp, salty air.
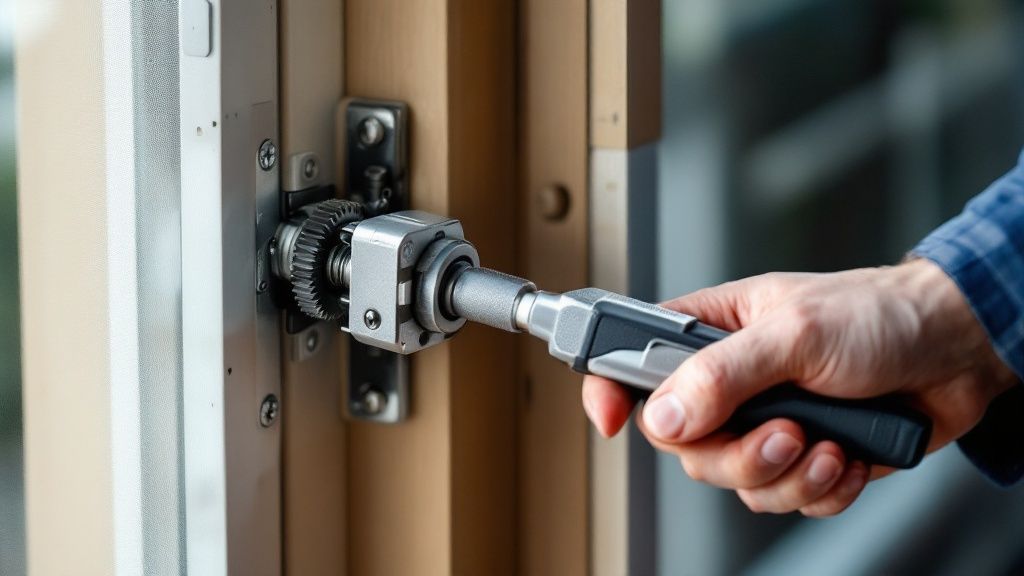
The Repair Process: A Step-by-Step Guide
The process involves finding the faulty part, making careful adjustments, and replacing it if needed. The goal is to make the window open, close, and lock easily and securely again. A well-done hardware replacement can make an old, stubborn window feel brand new.
Good hardware function is also important for a tight seal to prevent drafts. Besides making sure the window operates smoothly, homeowners should also think about securing your windows effectively to improve home safety.
Actionable Tips for a Professional Finish
To ensure your hardware repair is successful, follow these pro tips:
- Take Photos First: Before you take any hardware apart, take clear pictures from a few angles. This will be your guide for putting it back together.
- Lubricate Moving Parts: Use a small amount of white lithium grease on all metal parts that rub together, like hinge joints and operator gears. This reduces friction and helps them move smoothly.
- Check for Warranties: Before you buy new parts, check if your window is still under warranty. Some manufacturers provide free replacement parts.
- Test After Each Adjustment: After you make a change, open and close the window completely. This helps you check if the adjustment worked before you move on.
While many hardware adjustments are DIY-friendly, finding the right replacement part can be hard. Sometimes, these issues are a sign of bigger problems, like poor window installation. If you're not sure, calling a professional is the best choice.
3. Glazing Compound Restoration and Window Putty Repair
For older wood casement windows, restoring the glazing is a classic and important repair. This involves replacing the putty that holds the glass in the frame. Over the years, this putty can get brittle, crack, and fall out, which weakens the window's seal.
This repair is key for historic homes where you want to keep the original look. If you see cracked or missing putty around your window panes, this is the fix you need. For homeowners in older neighborhoods of Salinas or Monterey, re-glazing windows helps prevent water from getting in and causing wood rot.
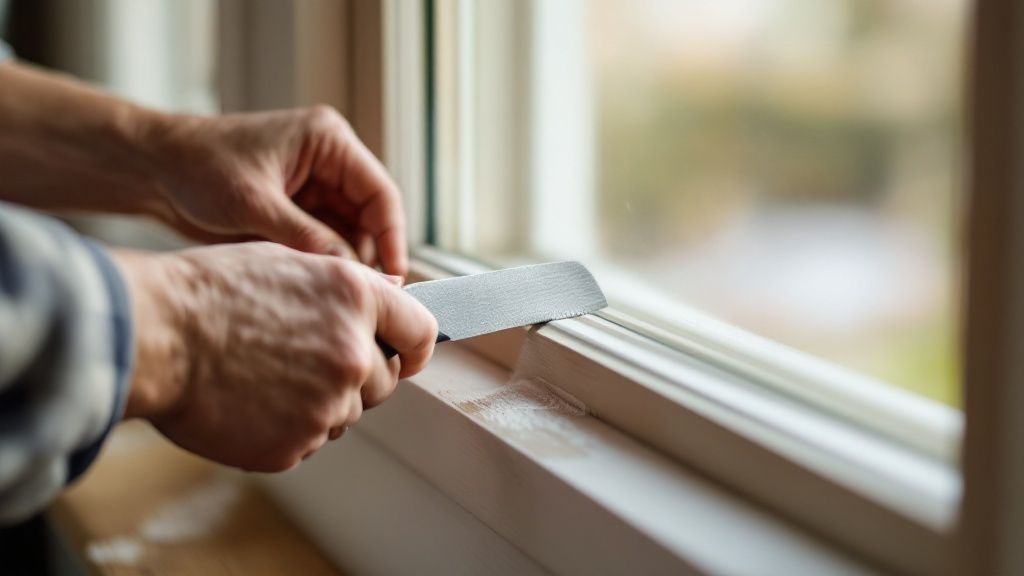
The Repair Process: A Step-by-Step Guide
The process involves carefully removing the old, hard putty without damaging the glass or the wood frame. Once the old putty is gone, the channel holding the glass is cleaned. Then, new putty is applied to create a strong, weatherproof seal that protects both the glass and the wood.
This is a skill that takes practice, but the goal is to create a clean, angled line of putty that will last for decades.
Actionable Tips for a Professional Finish
To get a perfect, long-lasting repair, follow these pro tips:
- Carefully Score Old Putty: Before trying to remove old, hard putty, gently score it with a utility knife near the glass. This helps prevent chipping or cracking the glass.
- Prime the Bare Wood: After cleaning out the old putty, apply a coat of oil-based primer to the bare wood in the channel. This stops the wood from soaking up oils from the new putty, which would make it dry out and fail too soon.
- Work the Putty: Knead the new glazing compound in your hands until it's soft and smooth, like dough. This makes it easier to apply and shape.
- Use the Right Angle: Apply the putty and then smooth it with a glazing knife held at a 45-degree angle. This creates a clean, even edge that sheds water well and looks professional.
Restoring window glazing is a rewarding DIY project that can make your windows last much longer. However, it requires patience. If you find rotted wood in the frame or don't feel comfortable handling glass, it's best to call a professional.
4. Sash Cord and Balance System Repair
While not as common in modern windows, older homes in areas like Salinas and Monterey might have casement windows with a sash cord and balance system. This system uses cords and weights (or springs) inside the frame to make opening and closing the window easier. Repairing it is a key fix for keeping these unique windows working properly.
This fix is needed when a window is hard to open, slams shut, or won't stay open. These are signs that a sash cord has broken. For homeowners who want to preserve the history of their property, repairing this system is better than replacing the whole window.
The Repair Process: A Step-by-Step Guide
The repair involves getting to the parts inside the window frame, which often means removing some trim. The goal is to replace the broken cord and make sure the counterweight or spring is set correctly for the window's weight. This brings back the smooth operation the window was designed for.
This process requires careful work and an understanding of older windows. The key is to take things apart, replace the broken parts, and put everything back together in the right order.
Actionable Tips for a Professional Finish
To make sure your sash cord repair is a success, follow these pro tips:
- Weigh the Sash: Before buying a new cord, carefully remove and weigh the window sash. Sash cords are made for specific weights, so choosing the right one is important.
- Mark the Cord's Path: Before you remove the old cord, take a photo or draw a picture of how it's routed. This will save you time and frustration later.
- Choose a Strong Rope: For coastal homes in Monterey County, choose a modern, synthetic rope instead of cotton. It's much more resistant to rot and stretching.
- Test Before Finishing: Once the new cord is in, test the window by opening it to different heights. Make sure it holds its position before you put the trim back on.
Repairing a sash cord is one of the more advanced fixes for a casement window. If you’re not comfortable taking your window frame apart, calling for professional help is the safest and best solution.
5. Frame Rot Repair and Wood Restoration
For wood casement windows in older homes, rot is a major problem. Repairing frame rot is a critical fix that saves the entire window unit. This advanced technique involves removing the decayed wood and rebuilding the frame, which can save you from a full replacement.
This fix is needed when you find soft, spongy, or discolored wood on your window frame. It’s a common problem for residents in Salinas, where moisture can speed up wood decay. Fixing rot early not only restores the window but also stops the damage from spreading.
The Repair Process: A Step-by-Step Guide
Wood restoration is a multi-step process. It starts with carefully removing all the rotted material. Then, a special wood hardener is applied to strengthen the remaining wood. Finally, a strong epoxy filler is used to rebuild the damaged area, which is then sanded and finished to match the original frame.
This method preserves the character of historic windows. A successful repair leaves the frame strong and ready for priming and painting.
Actionable Tips for a Professional Finish
To make your frame restoration last, follow these expert tips:
- Remove All Bad Wood: Be sure to carve out every bit of soft or discolored wood. The hardener and filler need a solid base to stick to.
- Help the Hardener Soak In: Drill small holes into the wood around the rotted area. This lets the liquid wood hardener soak in deeper, making the wood stronger from the inside out.
- Apply Filler in Layers: Put the epoxy filler on in thin layers, about a quarter-inch thick at a time. This prevents cracking and helps each layer cure properly.
- Sand for a Smooth Finish: Lightly sand the cured filler before priming. This helps you shape the repair to perfectly match the original window profile.
Frame restoration can be a DIY project, but it takes patience. Wood rot is often caused by moisture issues, like window condensation. To learn how to prevent future damage, read more about managing condensation and mold on windows. If the rot is widespread, calling a professional is the safest choice.
6. Glass Replacement and Reglazing
When a casement window's glass is cracked, foggy, or shattered, replacing the glass is the best pro fix. This repair involves carefully removing the damaged pane and installing a new one with a perfect seal. It's a key repair for restoring the window's appearance, safety, and energy efficiency.
This is the solution for windows with storm damage, failed seals causing fogging between panes, or for homeowners who want an upgrade. For residents in Salinas and Monterey County, upgrading from single-pane to double-pane Low-E glass is a popular fix. The U.S. Department of Energy notes that this can reduce energy loss by 25%–50%.
The Repair Process: A Step-by-Step Guide
Reglazing a window requires careful work and a focus on safety. It starts with removing the broken glass and old sealant. The window sash must then be cleaned to create a good base for the new glass pane, which is then set, secured, and sealed.
Properly sealing the new glass is key for a long-lasting repair. A professional installation ensures the window is strong and protects your home from the weather.
Actionable Tips for a Professional Finish
To replace your glass successfully and safely, follow these expert tips:
- Safety First: Always wear safety glasses and heavy-duty, cut-resistant gloves when handling broken glass. Remove the large pieces first, then carefully clear out the smaller shards.
- Measure Carefully: Measure the glass opening in a few spots (top, middle, and bottom) both across and up and down. Order the new glass pane 1/8 inch smaller than the smallest measurement to allow for expansion.
- Support the Glass: For heavy double-pane units, use glazing tape or setting blocks along the bottom edge of the frame. This supports the glass and prevents stress cracks.
- Allow Full Curing Time: After you apply the new sealant, let it cure completely before you close or use the window. This ensures a strong, airtight, and watertight bond.
While replacing a single pane can be a DIY task, handling double-pane units requires expertise. To learn more about glass types, you can read about what tempered glass is used for. If the window sash is rotted, it's best to get a professional evaluation.
Frequently Asked Questions (FAQs)
What is the most common problem with casement windows?
The most common issue is a worn-out or broken crank mechanism. Over time, the gears inside the operator can strip or wear down, making it hard to open or close the window. This is a frequent repair for homeowners in the Salinas area with older homes.
How do I know if my casement window needs repair or replacement?
If the window frame is still in good shape and the problem is with the hardware, weatherstripping, or a single glass pane, a repair is usually the best and most affordable option. However, if there is major wood rot, a badly warped frame, or failed seals on multiple double-pane windows, replacement is often a smarter long-term investment.
Can I replace the crank handle on my casement window myself?
Yes, replacing the handle is one of the easier DIY repairs. Most handles are held on by a small set screw. Just loosen the screw, pull the old handle off, and slide the new one on. Make sure to buy a replacement handle that fits your specific window brand.
Why is my casement window leaking?
A casement window can leak for a few reasons. The most common causes are failed weatherstripping that no longer creates a tight seal, or cracked glazing putty around the glass. In some cases, water may be getting in due to improper window installation.
How much does it cost to repair a casement window in Monterey County?
The cost can vary a lot depending on the problem. A simple DIY hardware replacement might cost under $50 for parts. Professional repairs, like fixing extensive wood rot or replacing a large insulated glass unit, can cost several hundred dollars. For a precise quote, it’s always best to get a free consultation.
Your Local Casement Window Experts in Salinas and Monterey
You now have the knowledge to tackle the most common casement window problems. From replacing worn weatherstripping to adjusting a stubborn crank, these fixes can restore your window’s function and save you from the cost of a full replacement. Mastering these skills helps you handle minor repairs with confidence, preserving the charm of your home in Salinas or Monterey County.
By understanding the cause of drafts, sticking sashes, or failing hardware, you can find long-term solutions. We covered everything from simple seals that boost comfort to bigger tasks like restoring rotted frames. Each fix helps make your home more secure, efficient, and comfortable.
Key Takeaways for DIY Casement Window Repair
Remember these key points as you start your repair projects:
- Safety First: Always put safety first, especially when working with glass. Use the right tools and wear protective gear.
- Find the Real Problem: Before you start, take time to figure out what's wrong. Is it the operator, the hinge, or the sash? A correct diagnosis is half the battle.
- Know When to Call a Pro: While many of these repairs are DIY-friendly, some tasks like major rot repair or replacing insulated glass require professional skill. Knowing when to call an expert is a key part of repairing a casement window like a pro.
The ability to perform these top fixes not only improves your home but also gives you valuable skills. It connects you with your home’s upkeep, ensuring it stays a beautiful and functional space.
Well-maintained windows are critical to your home's health. They protect you from the weather, look great, and play a big role in your energy bills. By taking steps to repair them, you are making a smart investment in your property's value and your family's comfort.
When a repair seems too complex or you want to upgrade to modern, energy-efficient windows, our team is ready to help. As a family-owned business with decades of experience serving homeowners in Monterey County, Signature Glass and Windows Inc. provides expert repair services and honest advice on when to repair versus replace. Contact us today at 831-754-8855 or visit us online at Signature Glass and Windows Inc. for a free, no-obligation consultation to restore beauty and function to your home.